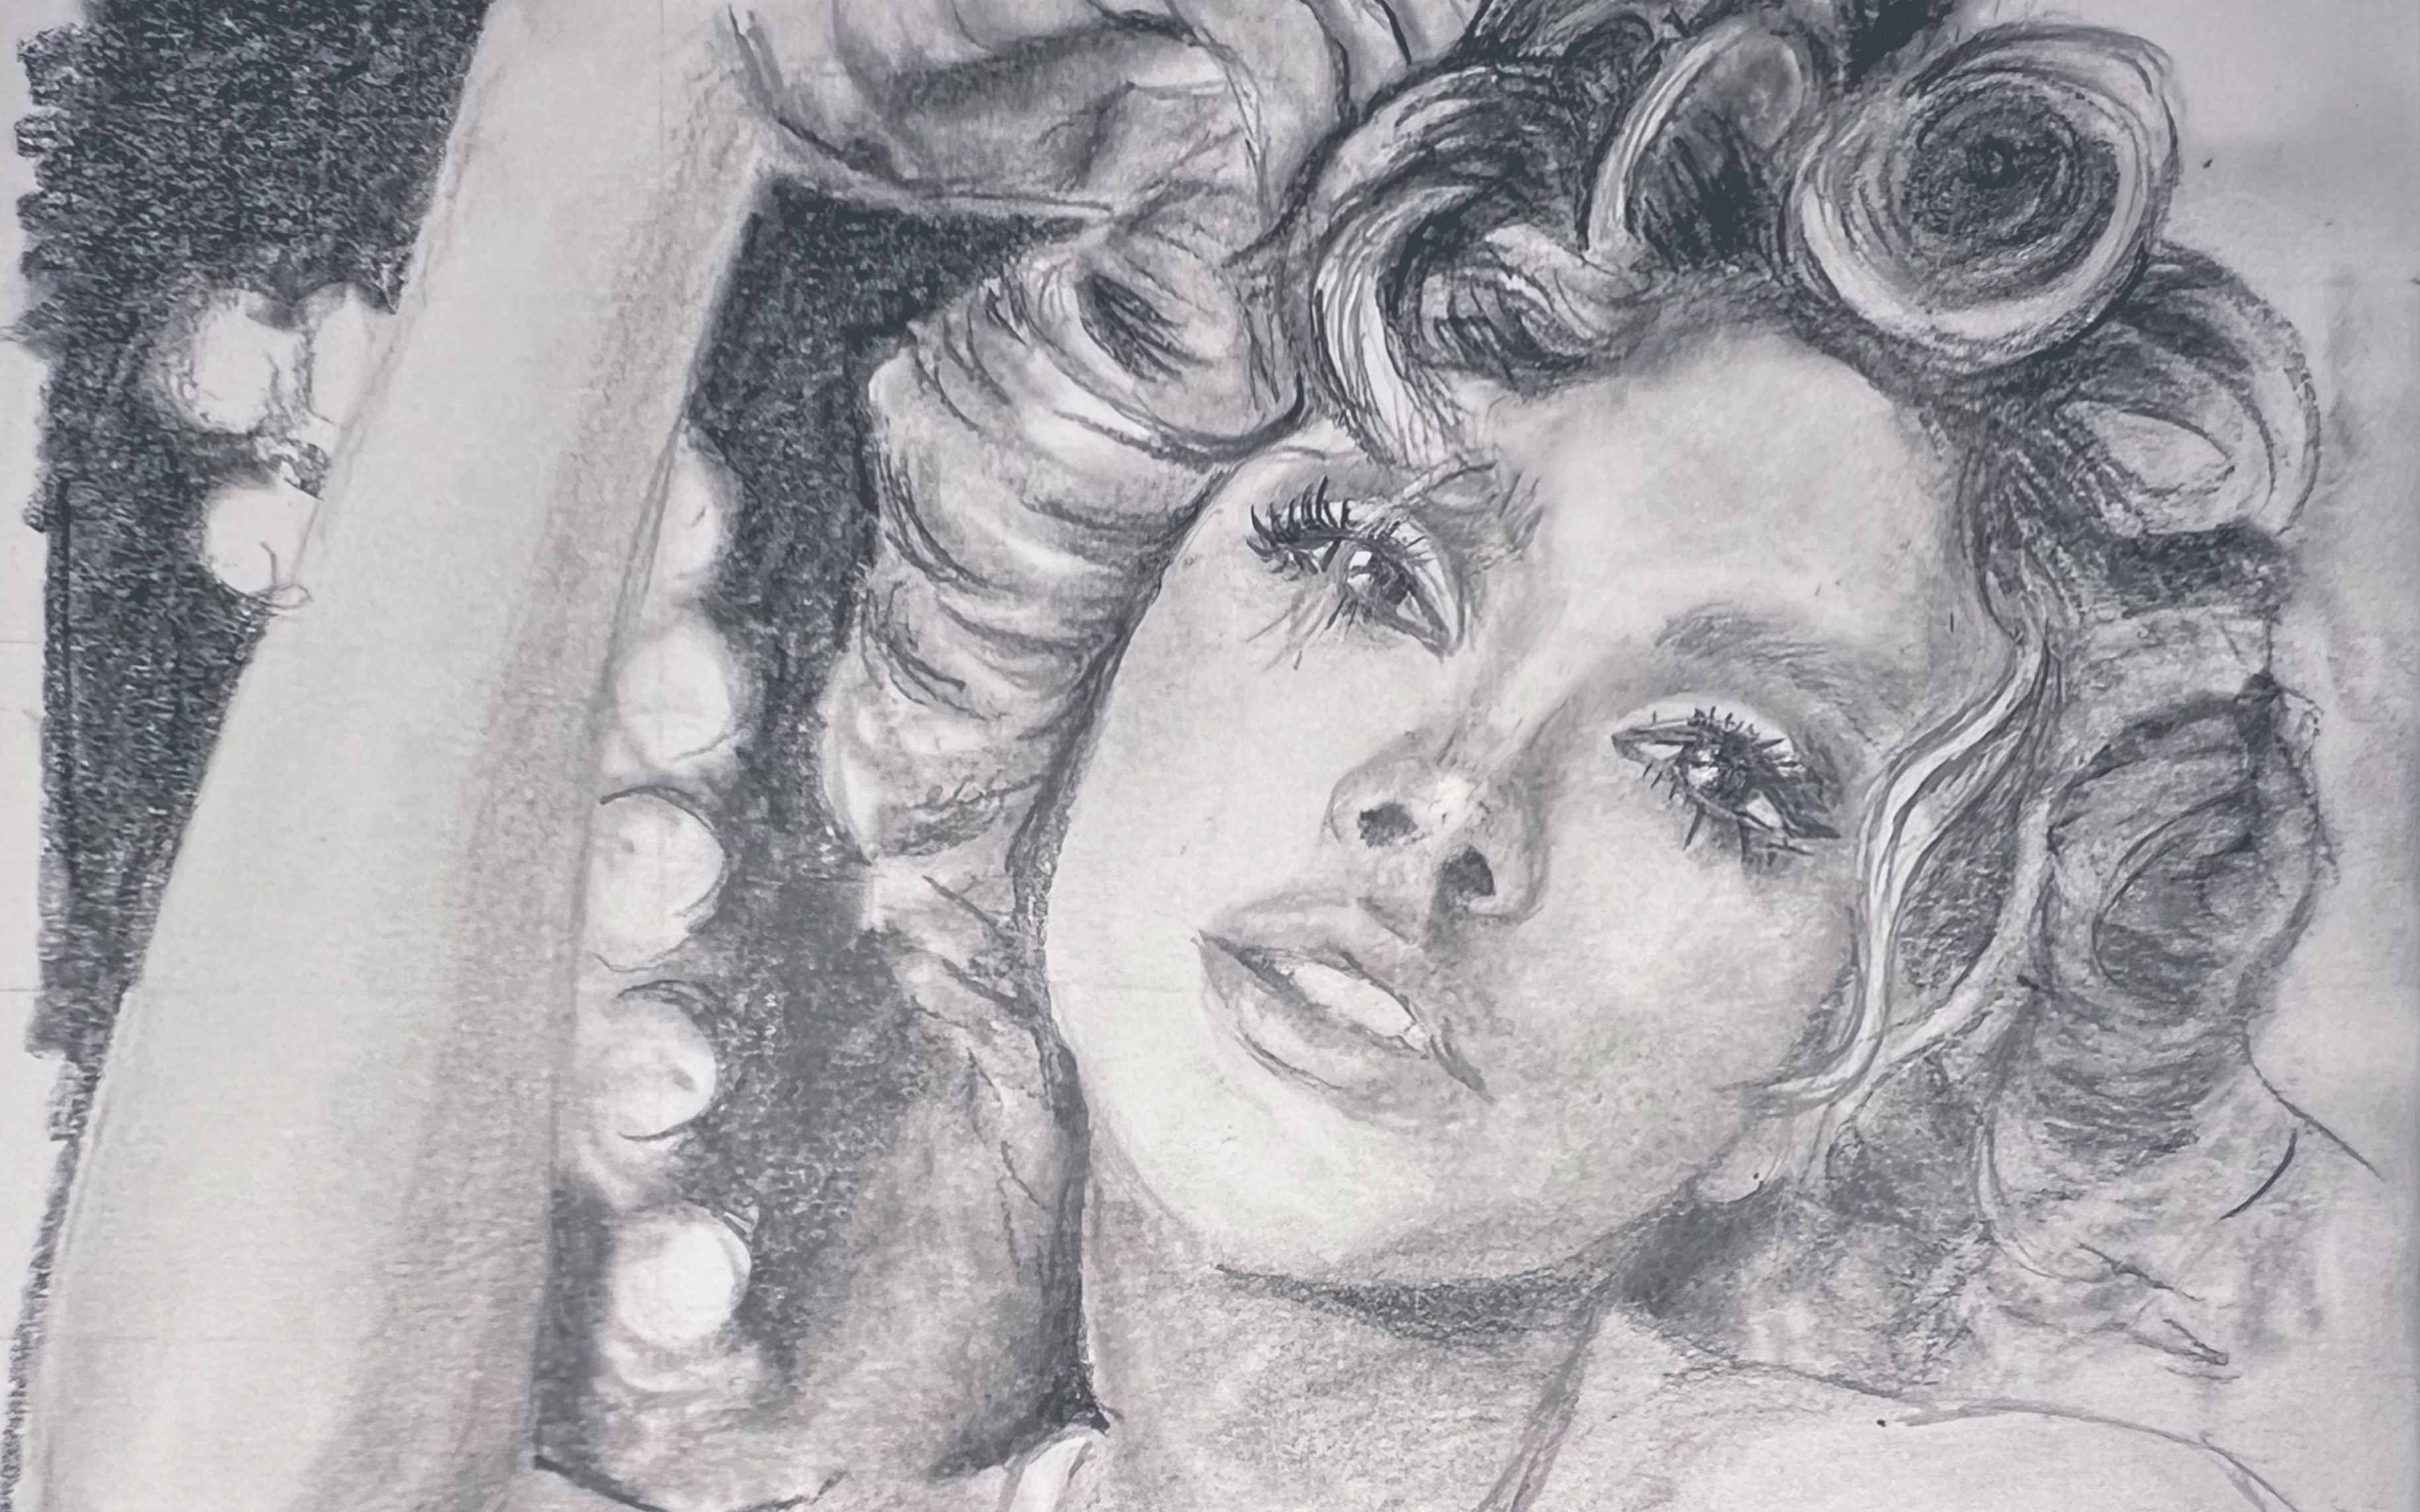
There are days when I feel like slowing down, carefully measuring every feature and refining a drawing over multiple sessions. Then there are days when I simply feel like drawing. This tutorial is for those days.
It's for anyone who wants to sit down with a pencil, spend a few enjoyable hours making something, and walk away with a finished drawing. Not because it has to be perfect, but because there's something deeply satisfying about starting with a blank sheet of paper and ending the day with something you created yourself.
That's one of the reasons I enjoy the grid method. It removes much of the guesswork from getting the proportions onto the page, which means you can spend less time worrying about whether the eyes are in the right place and more time doing the enjoyable part: observing, shading, experimenting, and watching a portrait slowly emerge. If you have not tried it before, our guide on what the grid method is explains how it works.
The approach in this tutorial is relaxed. Rather than working methodically through one square at a time, we'll use the grid to establish the proportions before developing the portrait as a whole. We'll simplify the larger shapes, separate the lights from the darks, gradually build the forms, and let the drawing evolve naturally. Our guide on why value matters more than colour explains why those light and dark shapes matter so much.
If you're new to portrait drawing, or you've always liked the idea of sitting down and making something without feeling like you're committing to a huge project, I hope this gives you the confidence to give it a try.
1. Laying in the drawing
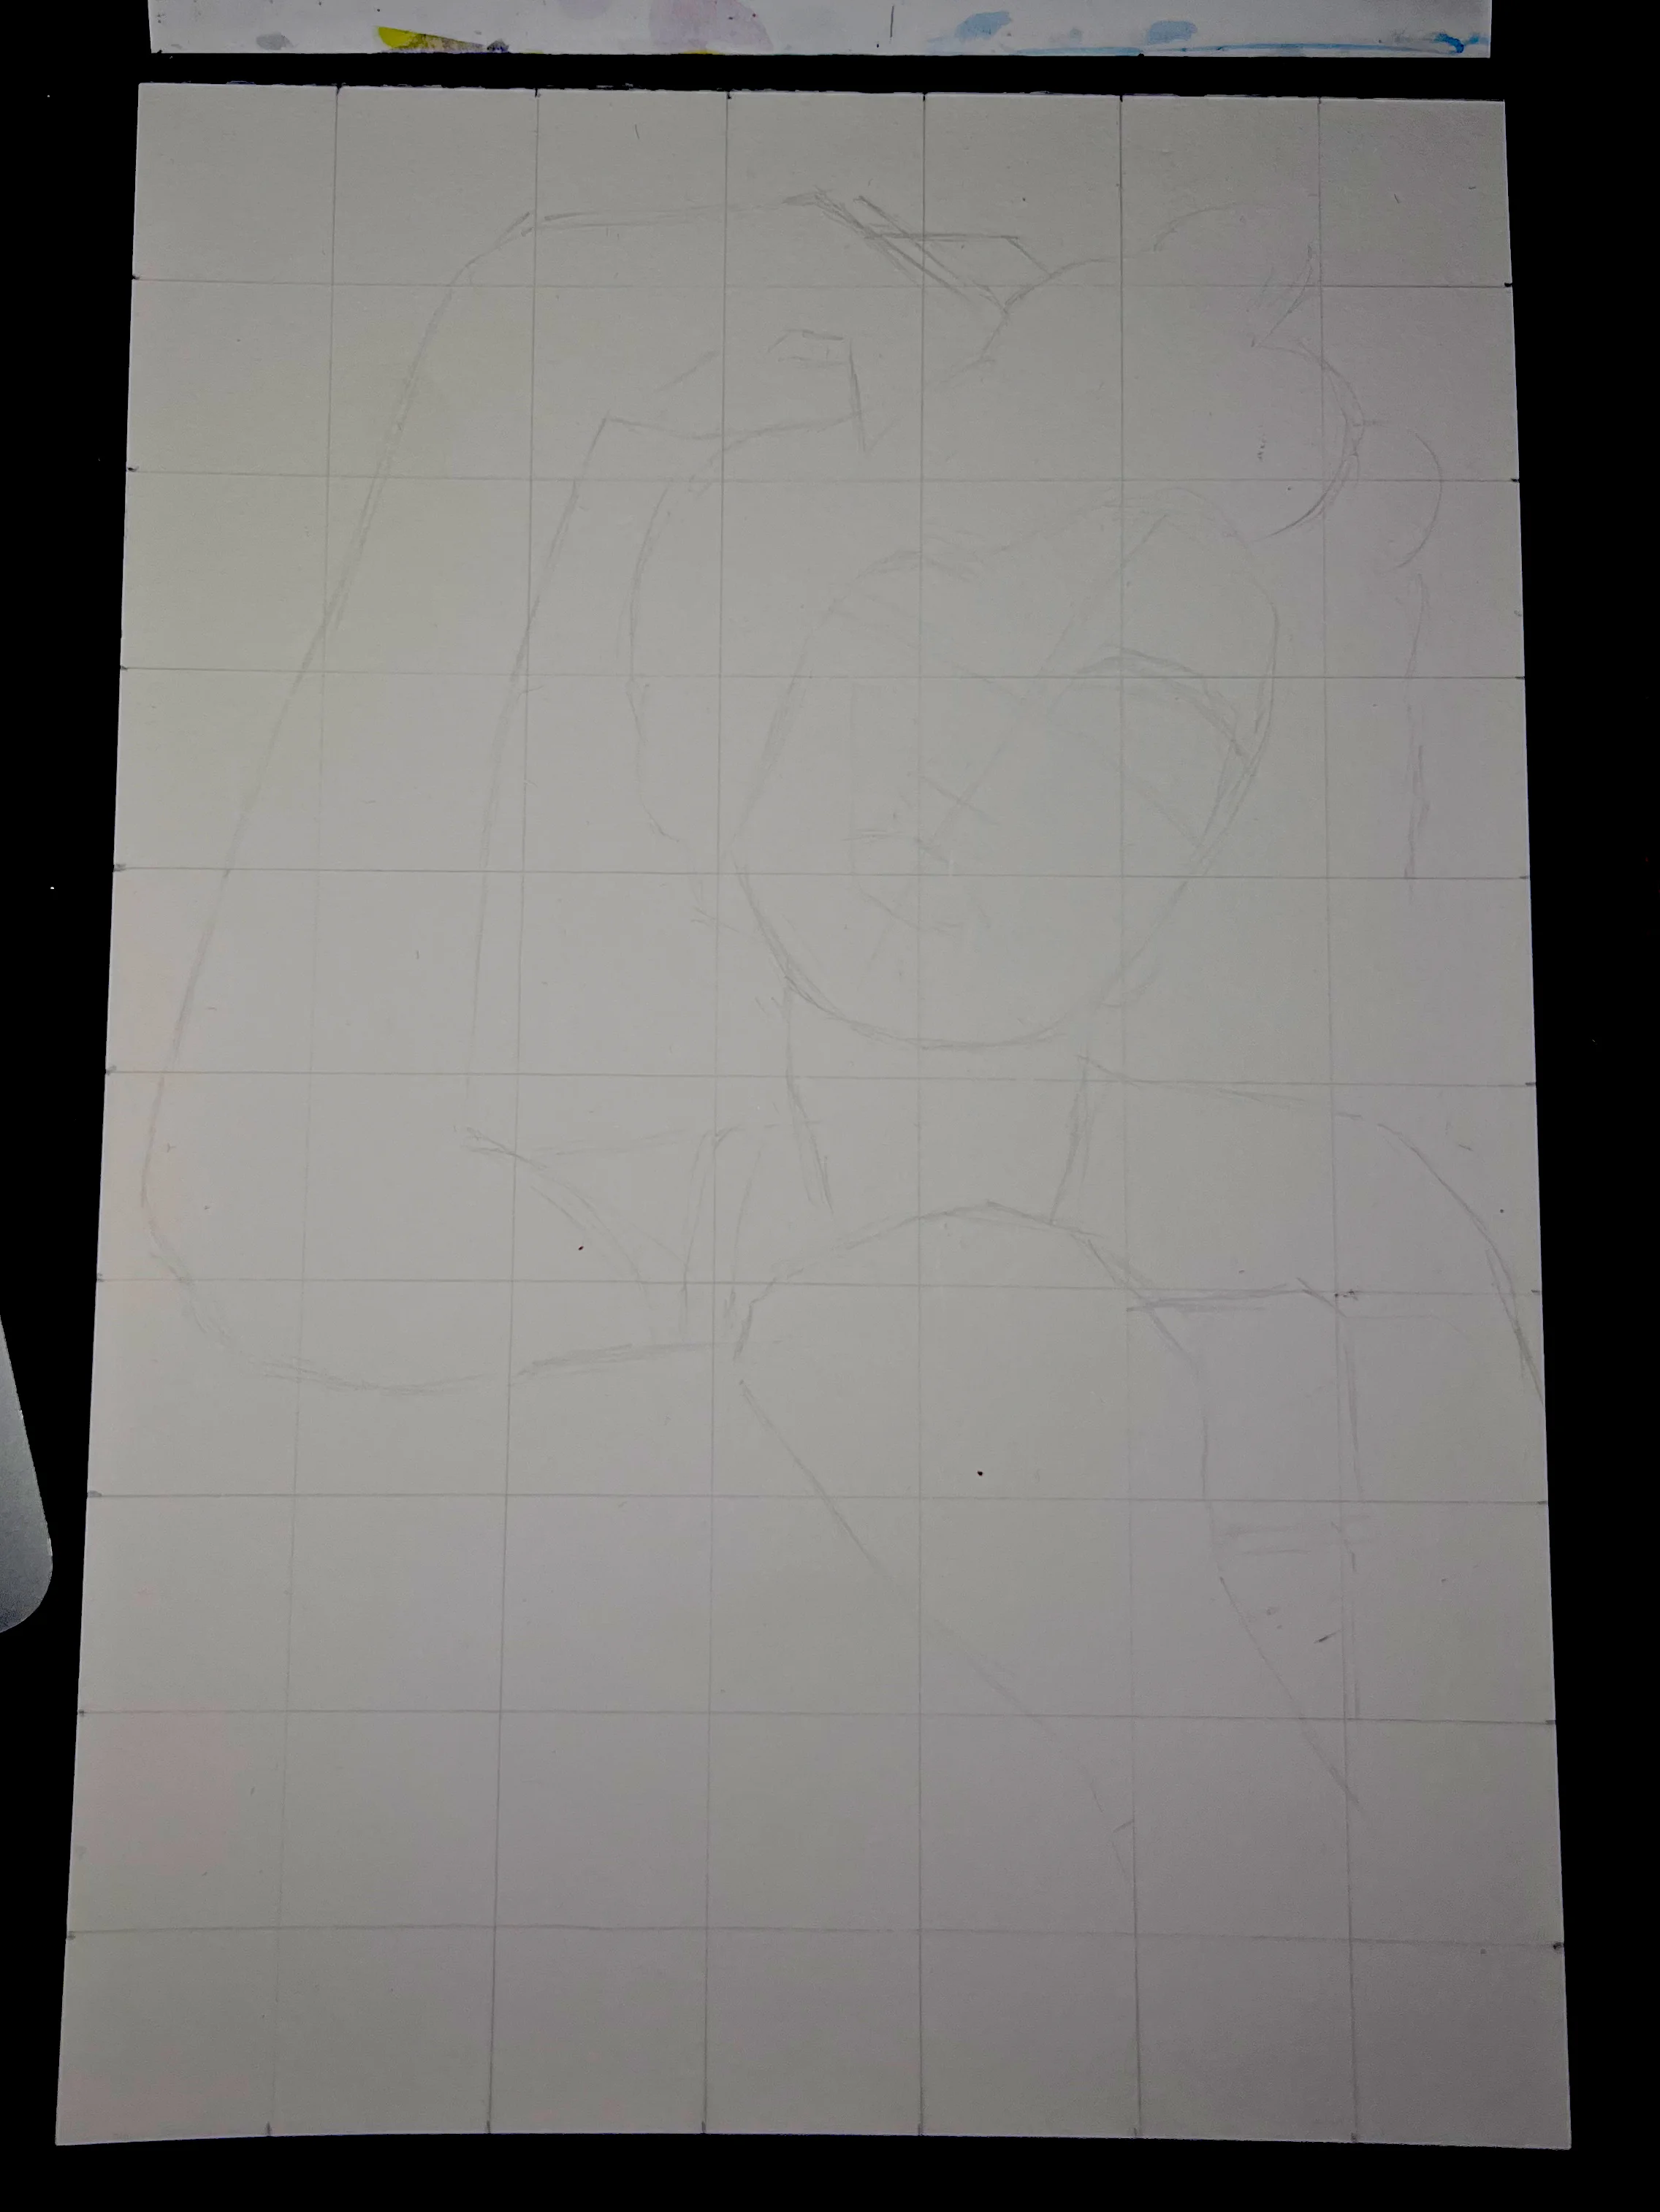
The first stage is simply mapping out the major shapes. Rather than trying to draw every tiny detail immediately, I begin with the biggest, simplest shapes and gradually refine them.
The grid makes this much easier because every square becomes a small measuring exercise. Instead of asking, "How do I draw this arm?", I ask much simpler questions: Where does the edge of the arm enter this square? Where does it leave? Is that point closer to the corner, halfway along the edge, or somewhere in between?
For example, the arm in one square might intersect about one eighth of the way across the top edge before leaving halfway along the bottom edge. Once those two points are found, joining them becomes much easier.
While it's useful to think this way, don't become trapped by the individual squares. Every so often, stop looking at the grid and look at the drawing as a whole. Make sure larger curves still flow naturally and straight edges haven't accidentally become bent. The grid is there to help you measure, not to dictate every mark you make.
Large shapes first
I also like to establish larger shapes before worrying about smaller ones. Take the hands, for example. Rather than trying to draw every finger immediately, I first sketch the overall shape of the hand. Once that feels right, I gradually divide it into smaller and smaller shapes until the fingers naturally emerge. It's much easier to correct one large shape than half a dozen tiny ones.
Construction lines
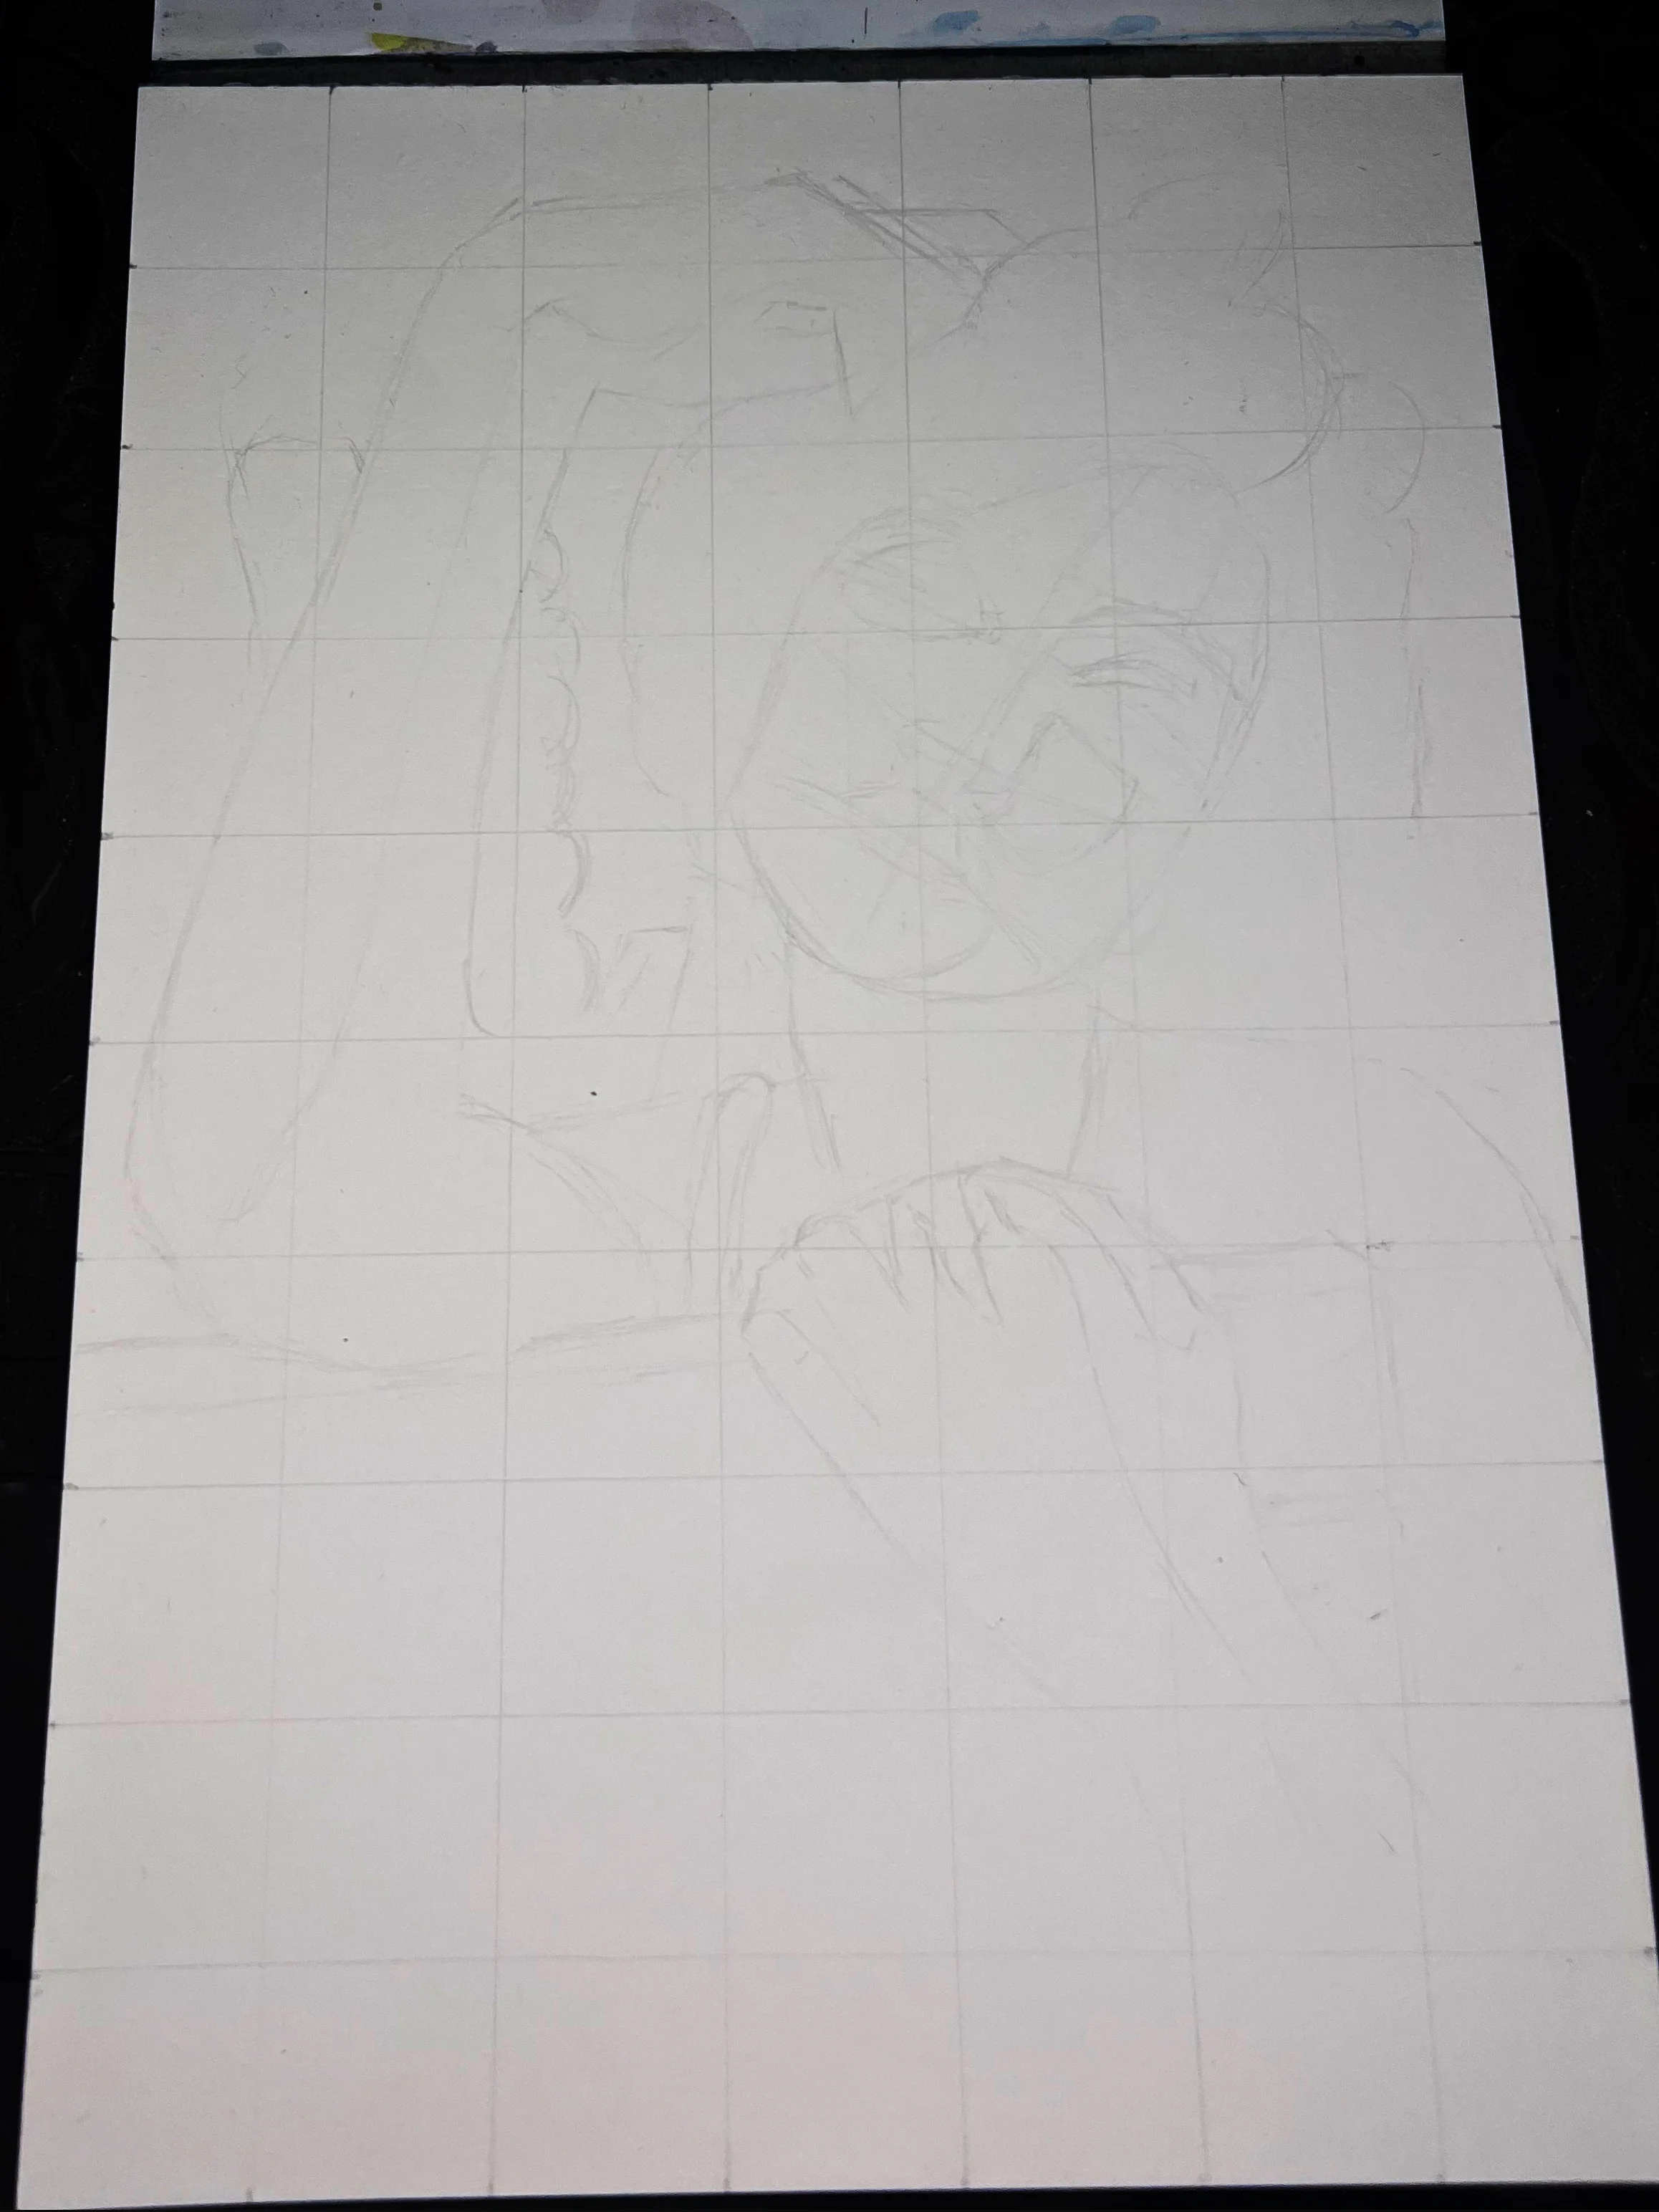
Although I'm using a grid, I still borrow a few ideas from traditional portrait construction. One habit I've picked up from studying the Andrew Loomis method is lightly marking the centre line of the face, along with the eye line, the base of the nose and the mouth line.
These simple guides help keep the facial features working together. Portraits are surprisingly sensitive. A tiny change to the angle of an eye or the placement of the mouth can completely change how convincing a likeness feels.
If portrait drawing is something you'd like to improve over time, I'd definitely recommend spending a little time learning the basic structure of the face. Understanding things like facial thirds, the spacing of the eyes, and the relationships between facial features gives you another way to check your work beyond simply copying what you see.
The same goes for studying light and form. The more you understand how light wraps around an object, the easier it becomes to create drawings that feel solid and three-dimensional. None of these things are prerequisites though. They're simply tools you can add to your toolbox over time.
The more carefully you measure, the more accurate your drawing is likely to be. The grid is simply a measuring tool, and like any measuring tool, it's only as precise as the person using it.
2. Separating light and shadow
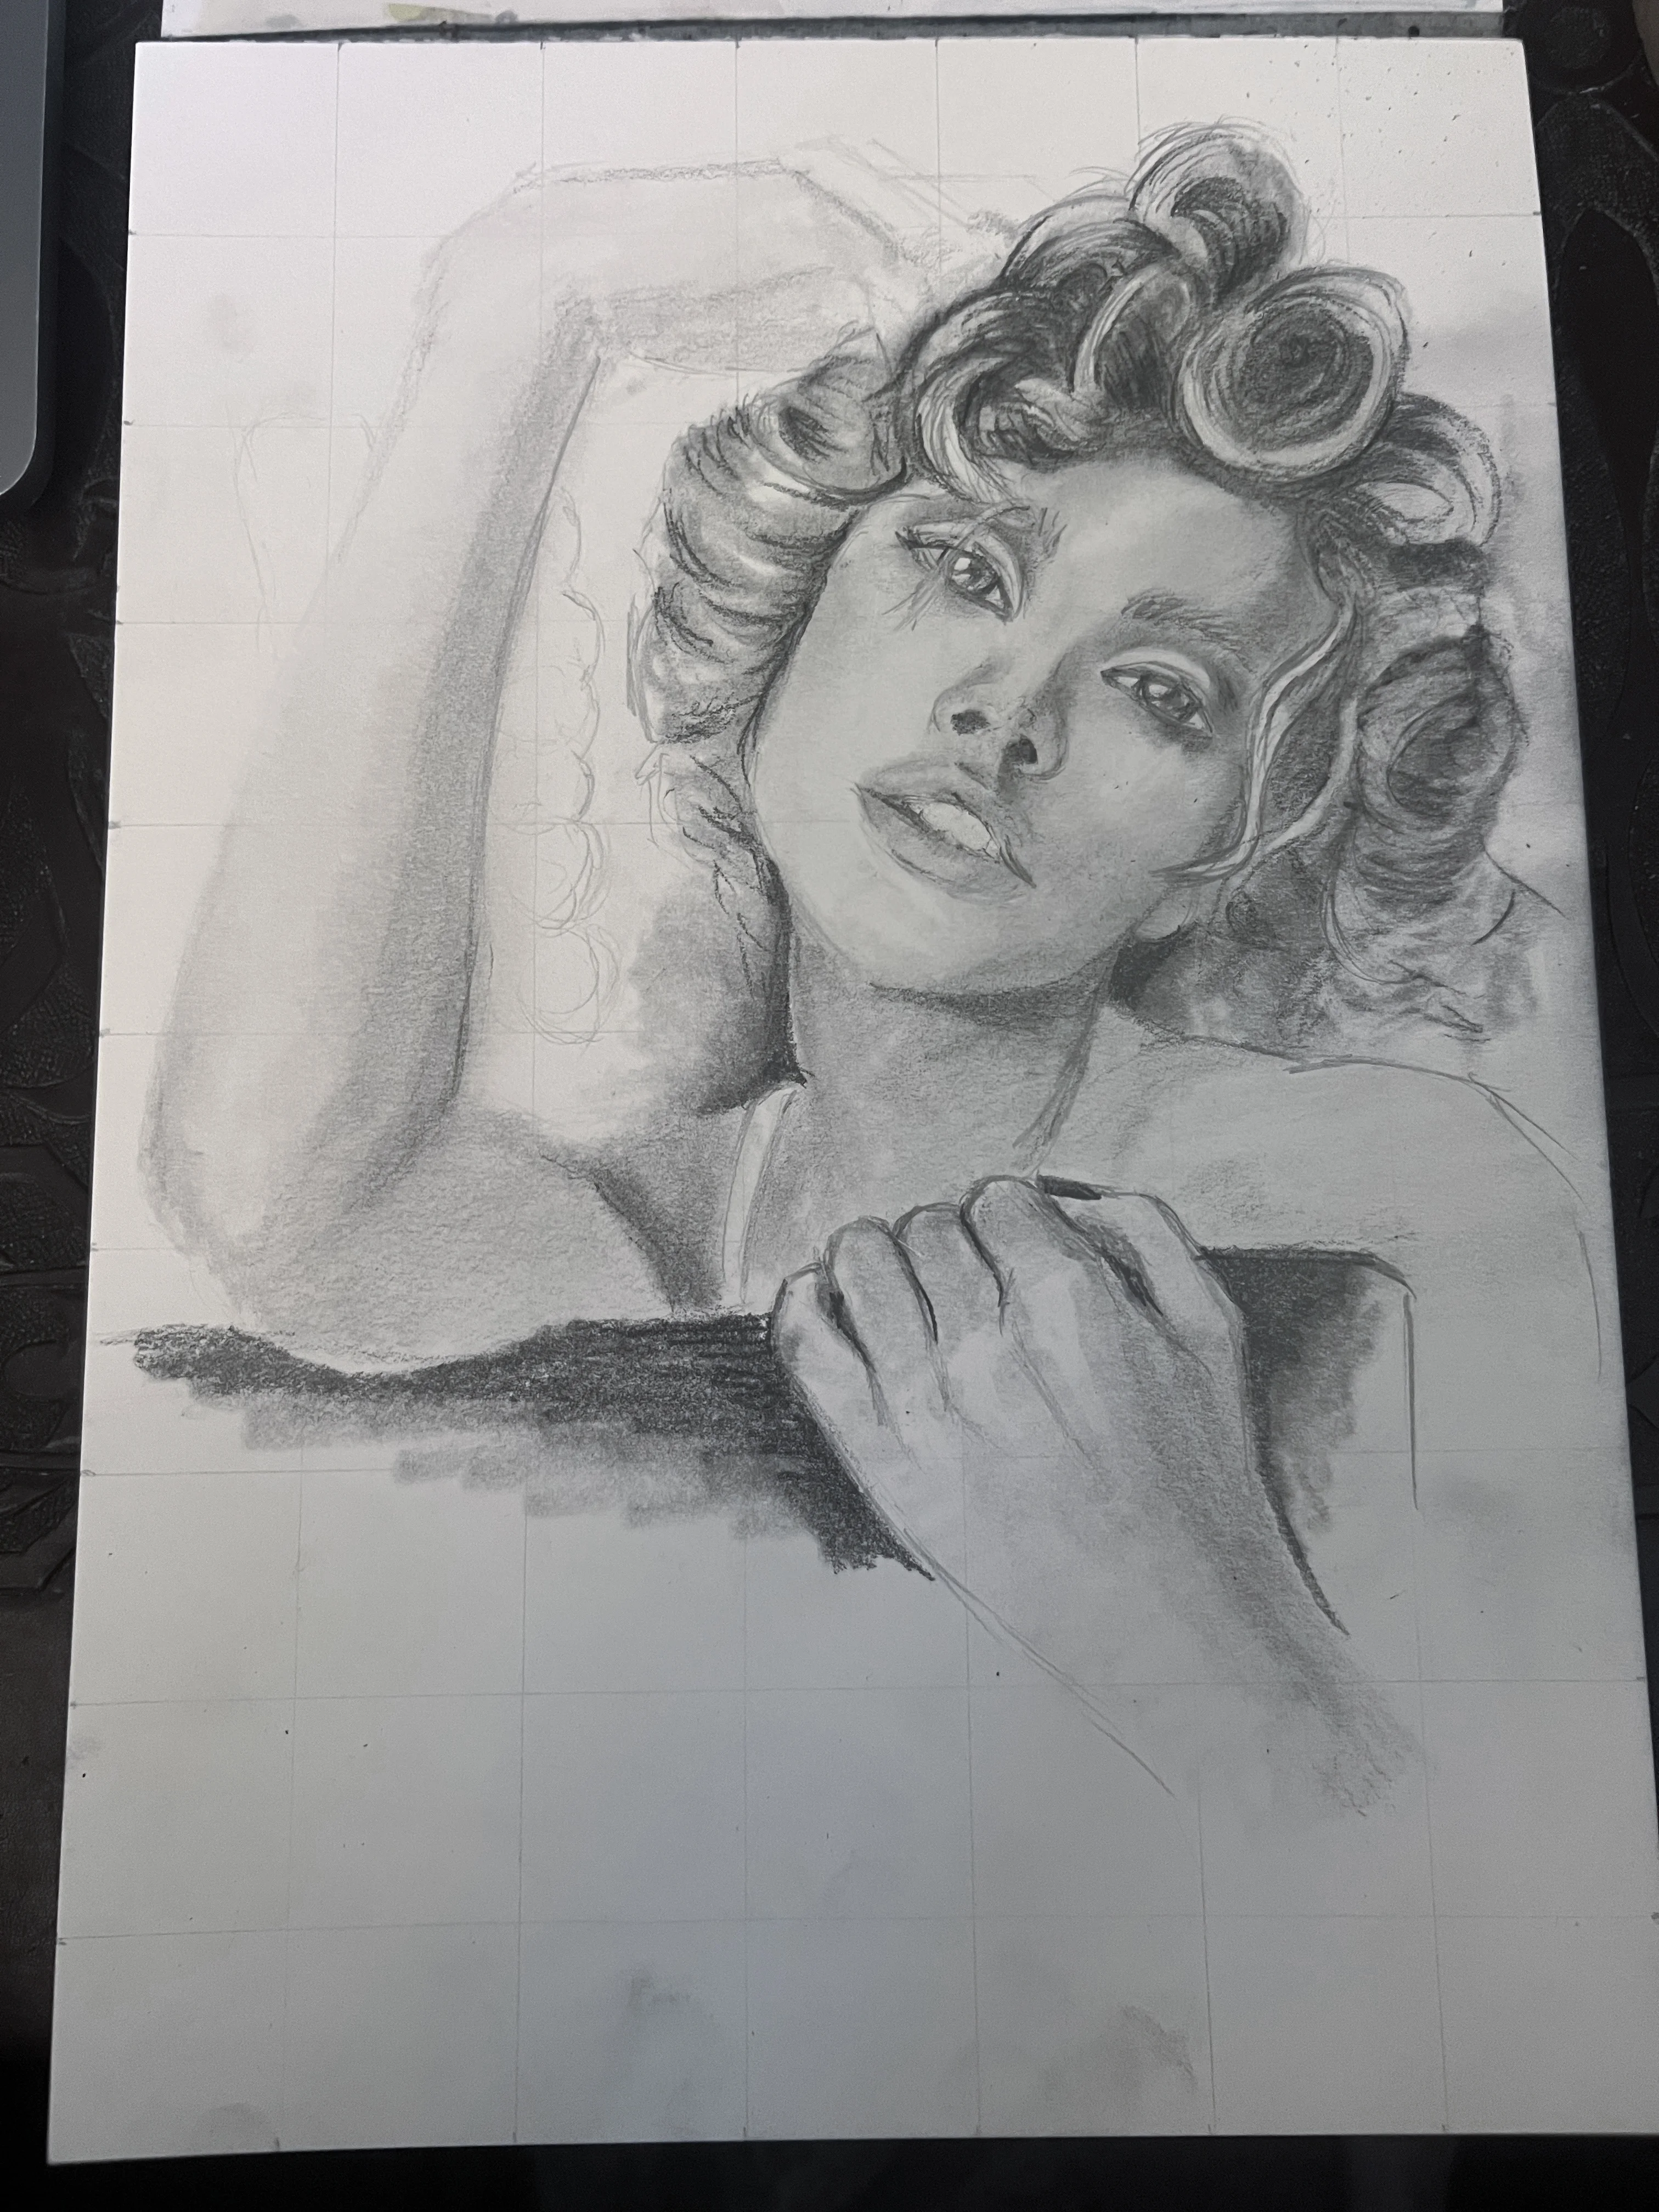
Once the drawing was established, I began simplifying the portrait into larger groups of light and dark. Usually this is one of my favourite stages because strong lighting creates obvious shadow shapes that are fun to work with.
This reference was a little different. The lighting is fairly even across the face, so instead of obvious cast shadows I had to be a little more flexible with what I considered part of the darker group. Rather than thinking literally about shadows, I simply grouped together the darker areas of the portrait. This helped simplify what could otherwise have been an overwhelming amount of information.
If you're completely new to drawing, here's a simple exercise that can help. On a spare piece of paper, use your pencil to create a smooth gradient from the lightest mark you can make to the darkest. This gives you a visual scale of the values your pencil can produce.
Now imagine that gradient divided in half. Everything darker than the midpoint belongs to your shadow family. Everything lighter belongs to your light family. When you look back at your reference photo, don't ask yourself, "Is this a shadow?" Instead, ask yourself, "Where would this sit on my gradient?" If it falls on the darker half, include it with your shadow shapes. If it falls on the lighter half, leave it for later.
Don't worry about matching the reference exactly. You're simply deciding whether an area belongs in the lighter or darker half of your value scale. Even if your darkest pencil mark isn't as dark as the darkest part of your reference, you can still preserve the overall relationships between the light and dark areas. It's not a perfect system, but it's a great way to train your eye to see values before details.
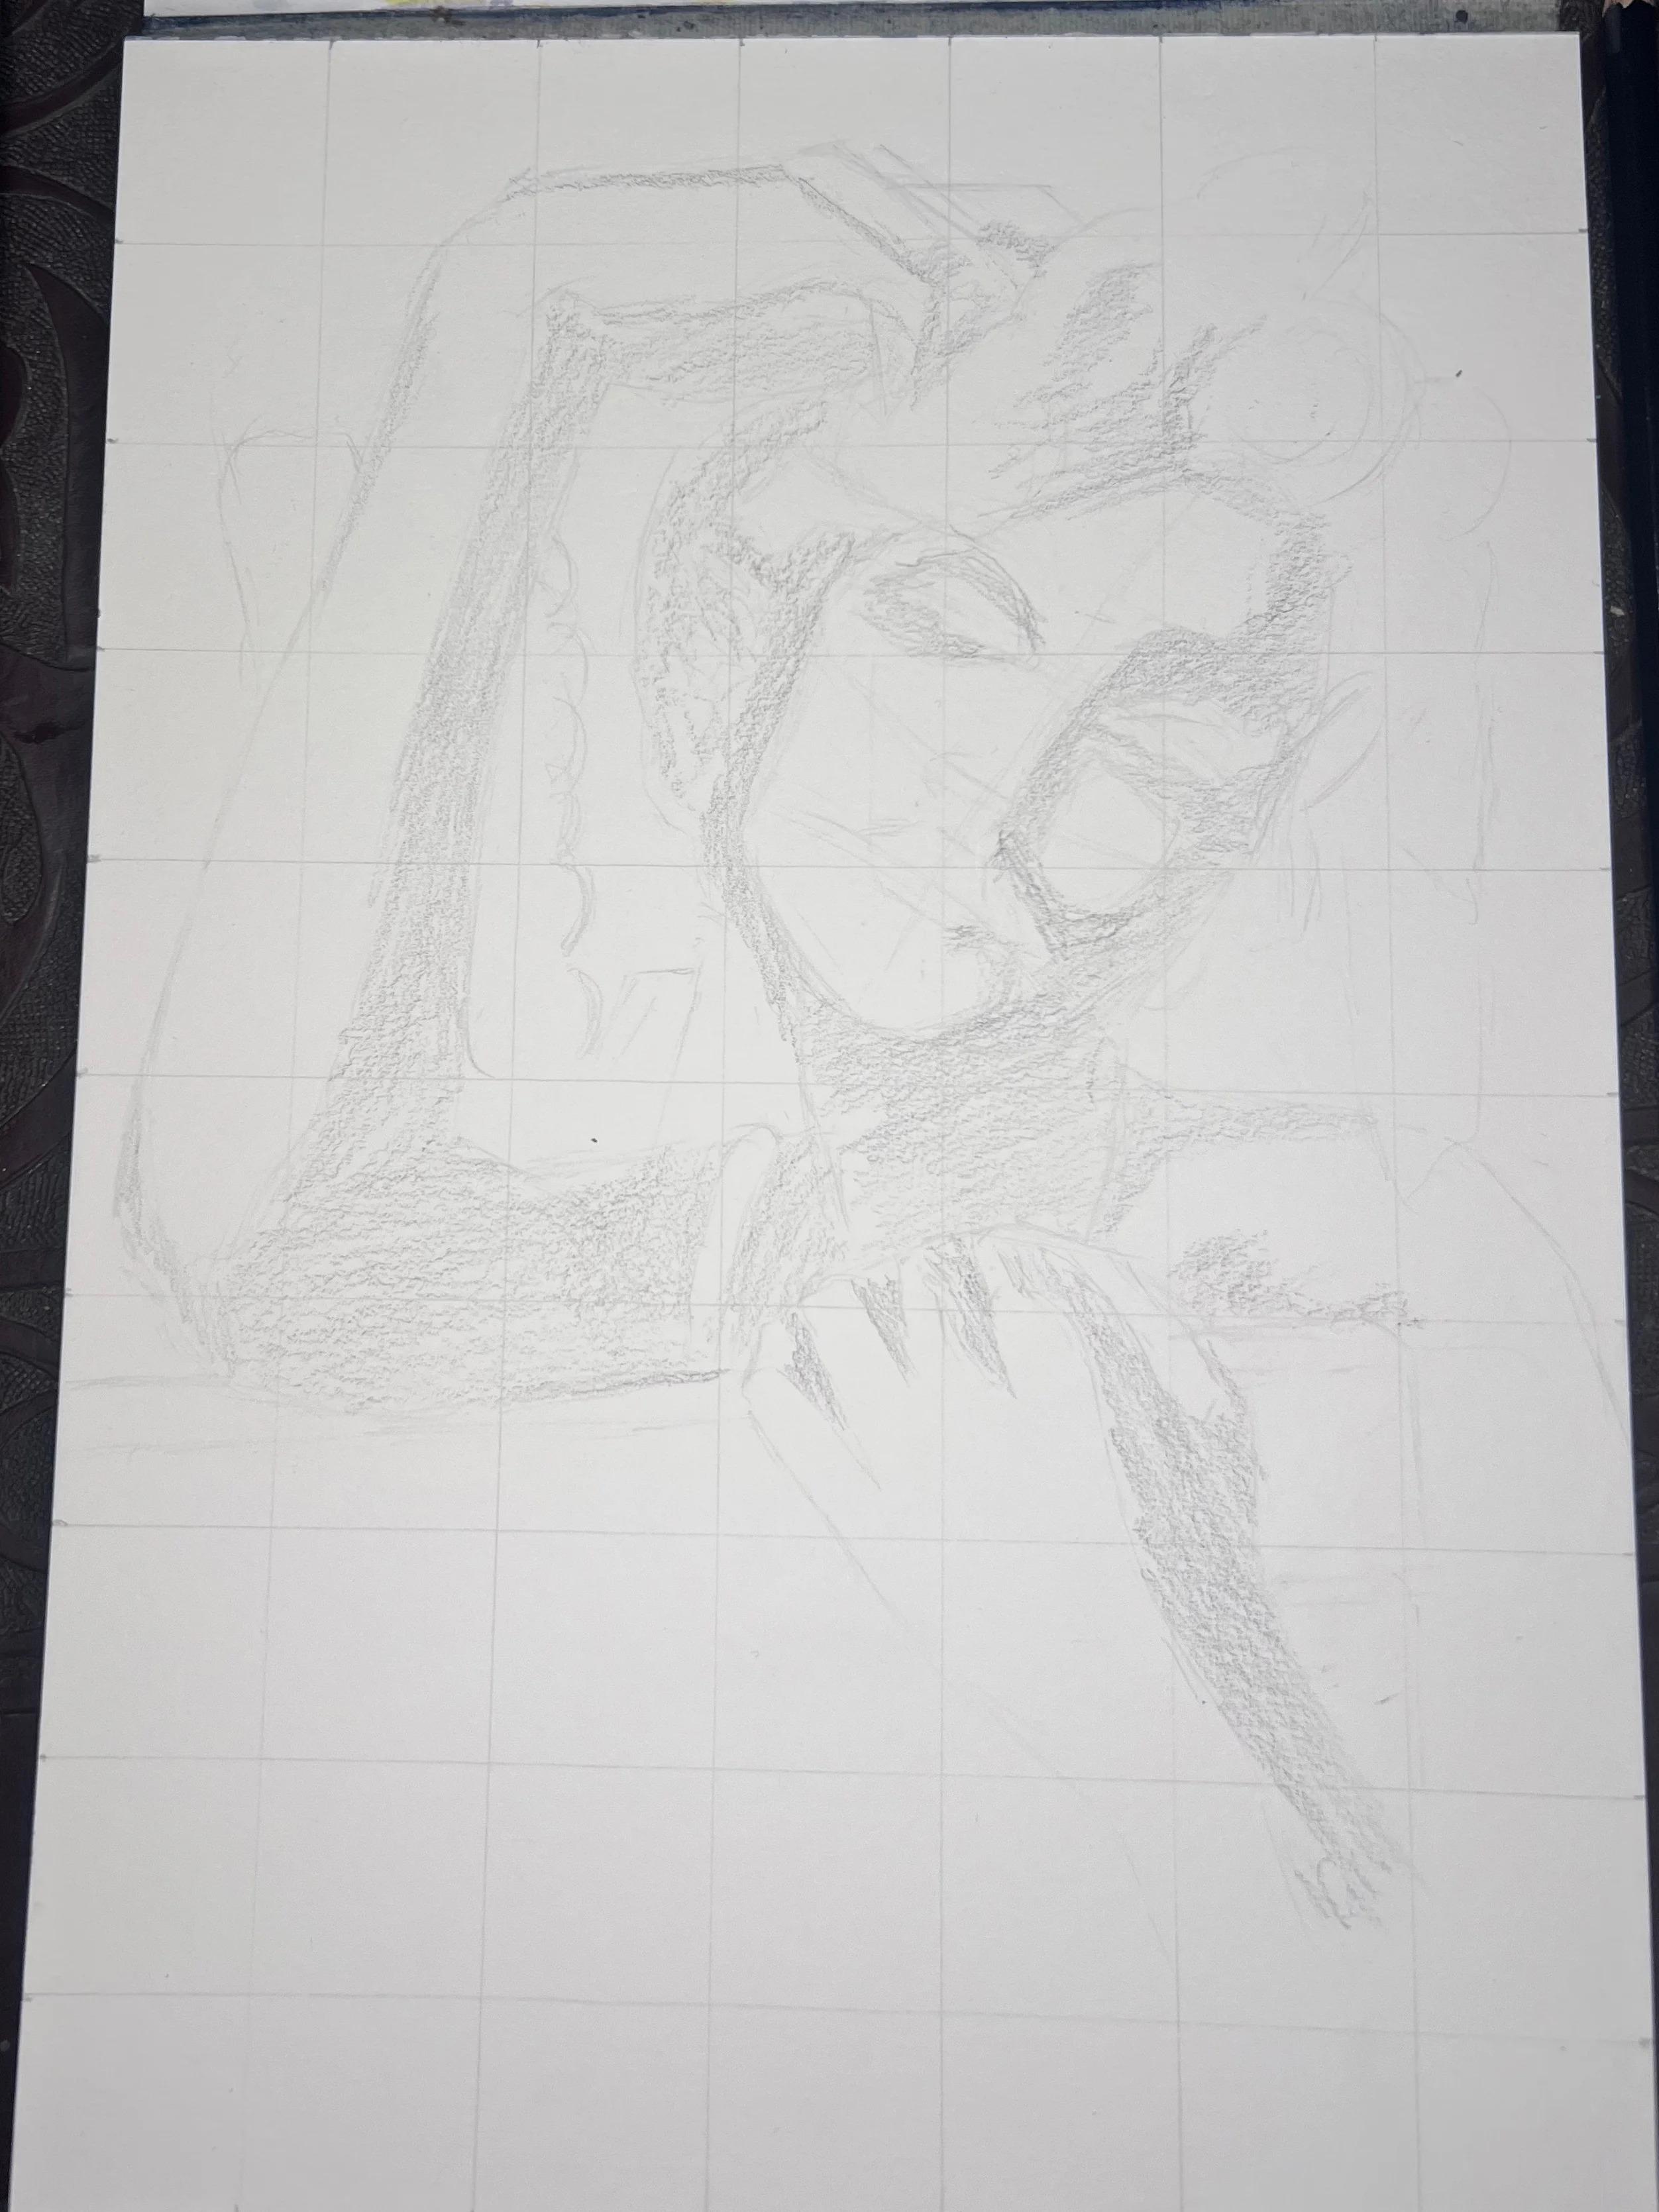
Forget what you're drawing
One idea that's helped me more than almost anything else is to stop thinking about what I'm drawing. Instead of drawing an eye, I'm looking at the shape of the shadow above it. Instead of drawing a nose, I'm looking at how the light wraps around it. Instead of drawing hair, I'm looking at groups of light and dark rather than individual strands.
Our brains are surprisingly bad at observation. Instead of drawing what we see, we often draw what we think an eye, a nose or a mouth should look like. The more you can think of your reference as a collection of shapes, edges and values instead of recognisable objects, the more accurate your drawing will usually become.
Build your values gradually
One thing I'd encourage, especially if you're new to graphite, is to work from light to dark wherever possible. When I blocked in the shadow areas for this portrait, I wasn't trying to establish the darkest values straight away. Instead, I filled each area with what I thought was roughly the lightest value that shadow could be. From there, I gradually deepened the areas that needed more contrast.
It's much easier to make a drawing darker than it is to make it lighter again. While you can lift graphite with a kneaded eraser, you'll rarely get the paper back to a completely clean white. Starting a little lighter gives you room to adjust as the drawing develops, rather than locking yourself into values that are difficult to undo.
Think of those first shadows as a foundation rather than a final decision. As you continue drawing, you'll naturally discover where the darkest darks belong.
3. Bringing the drawing together
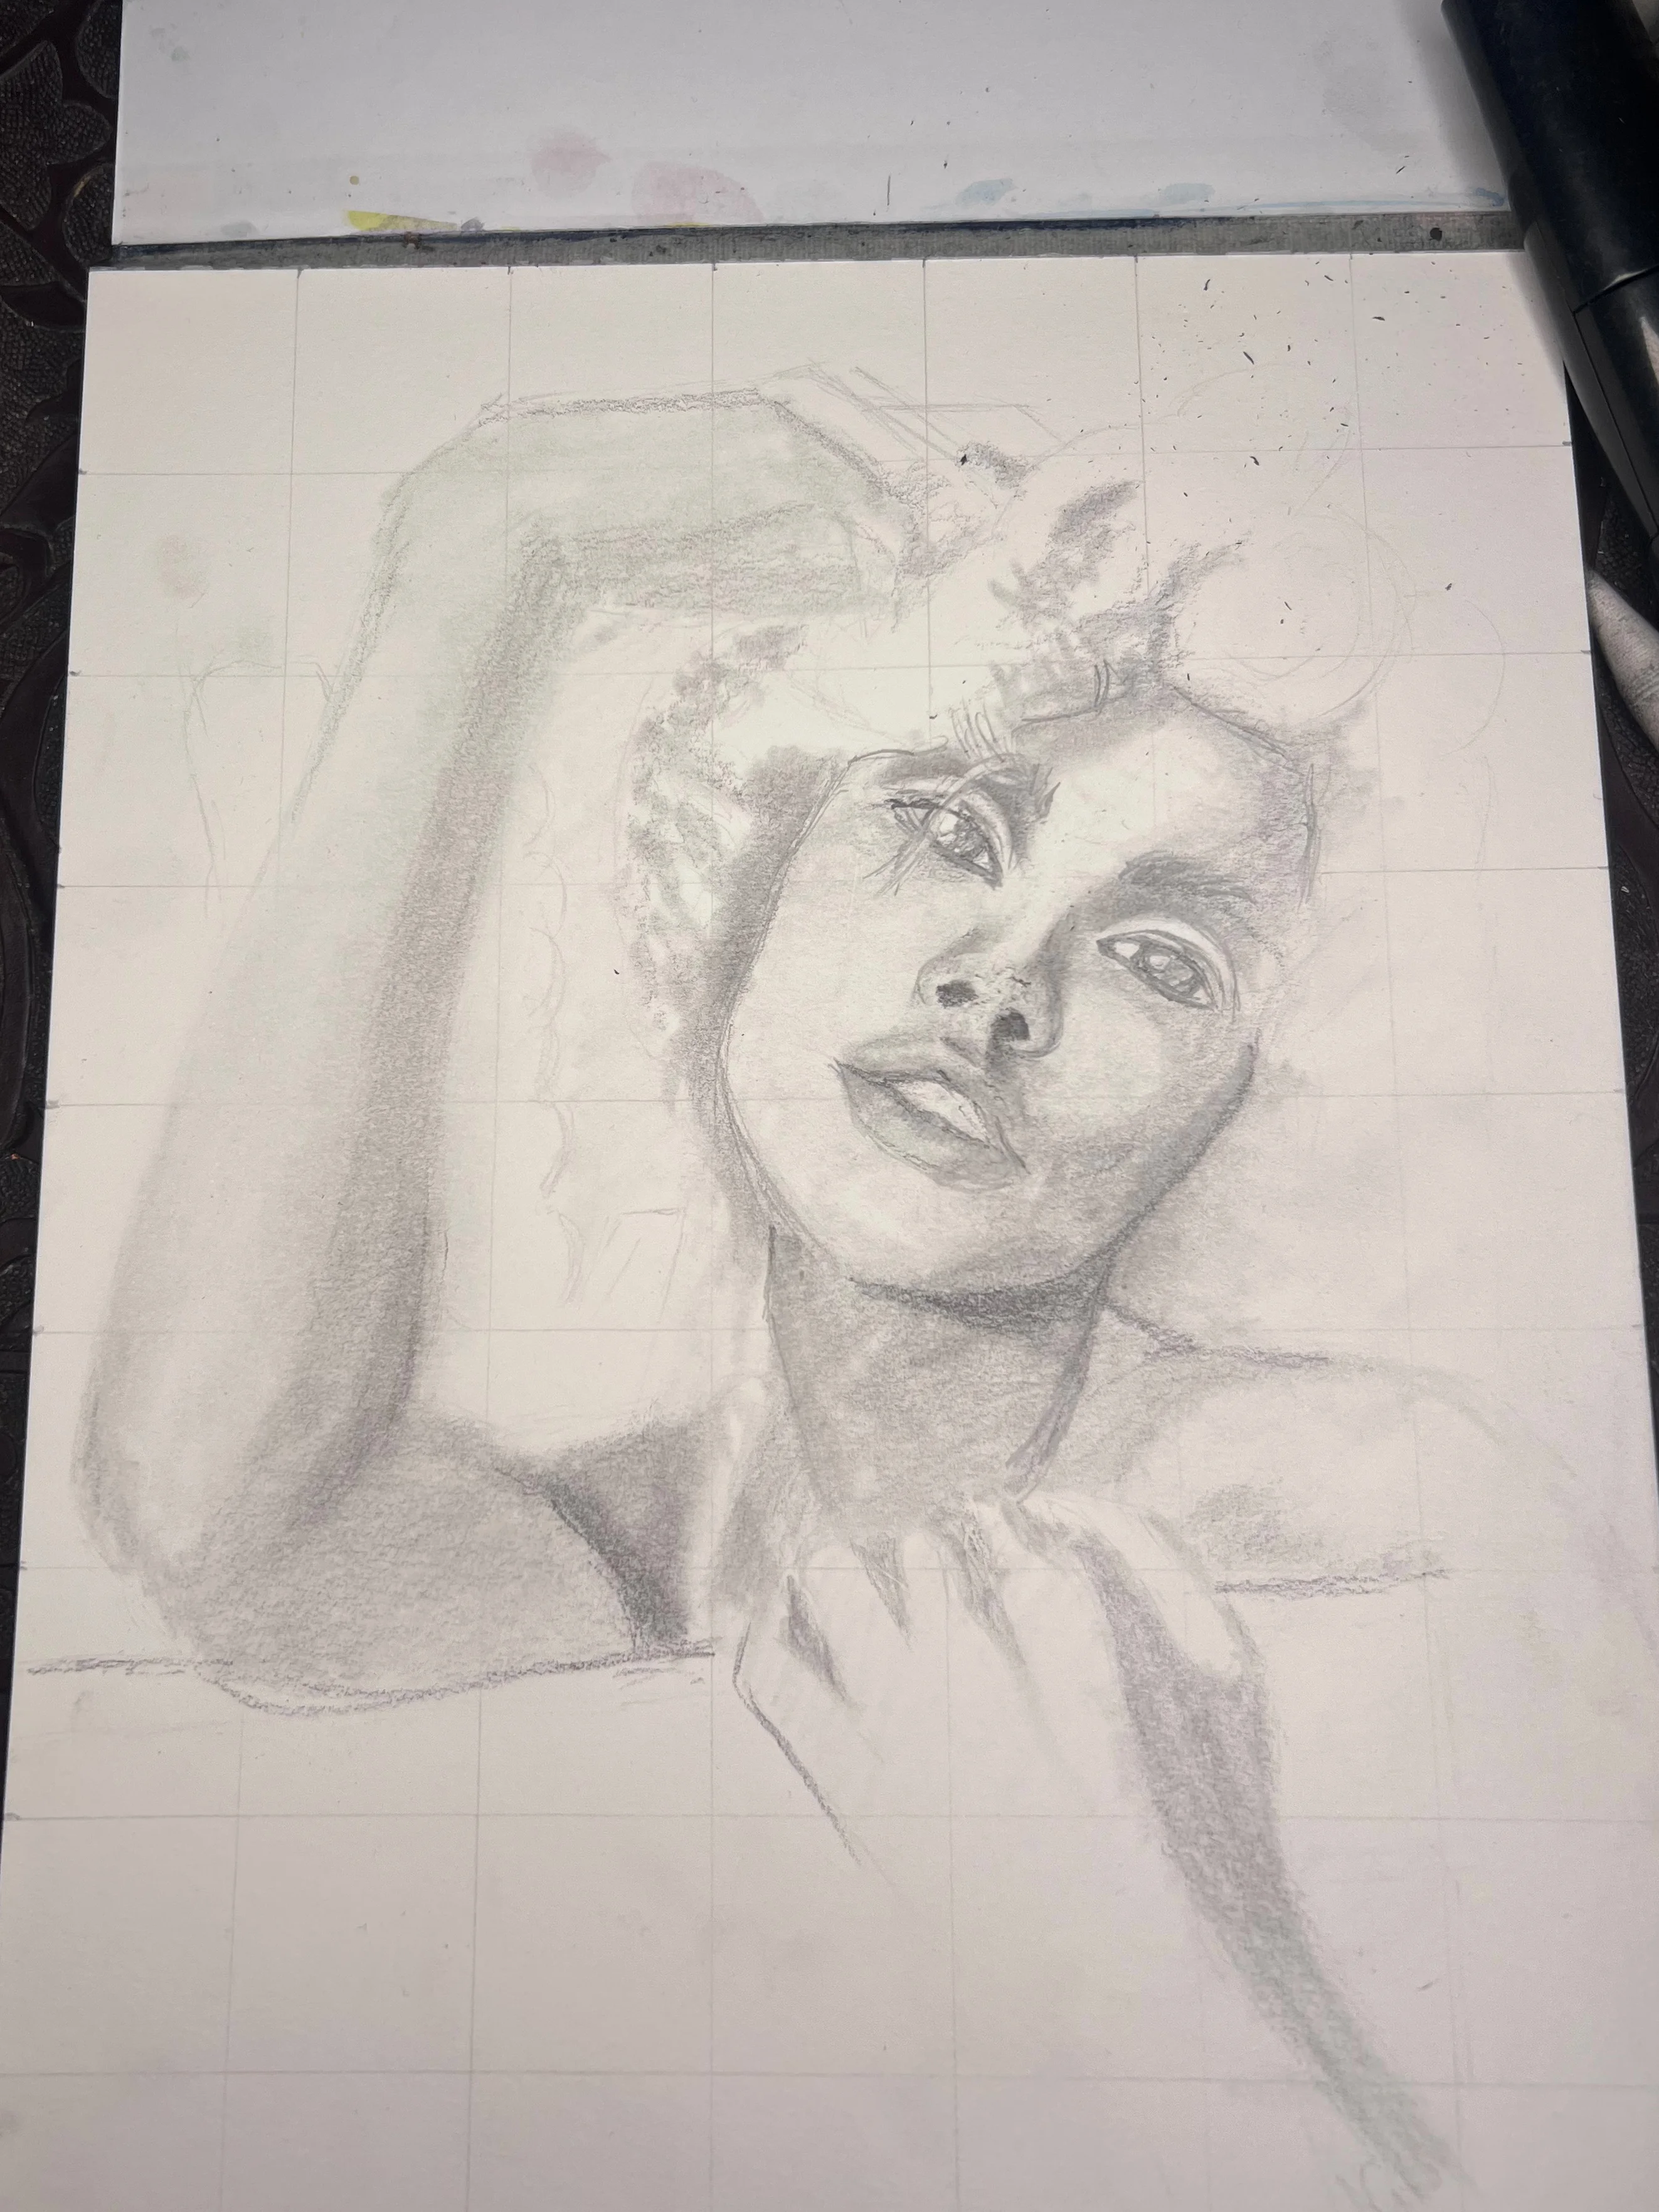
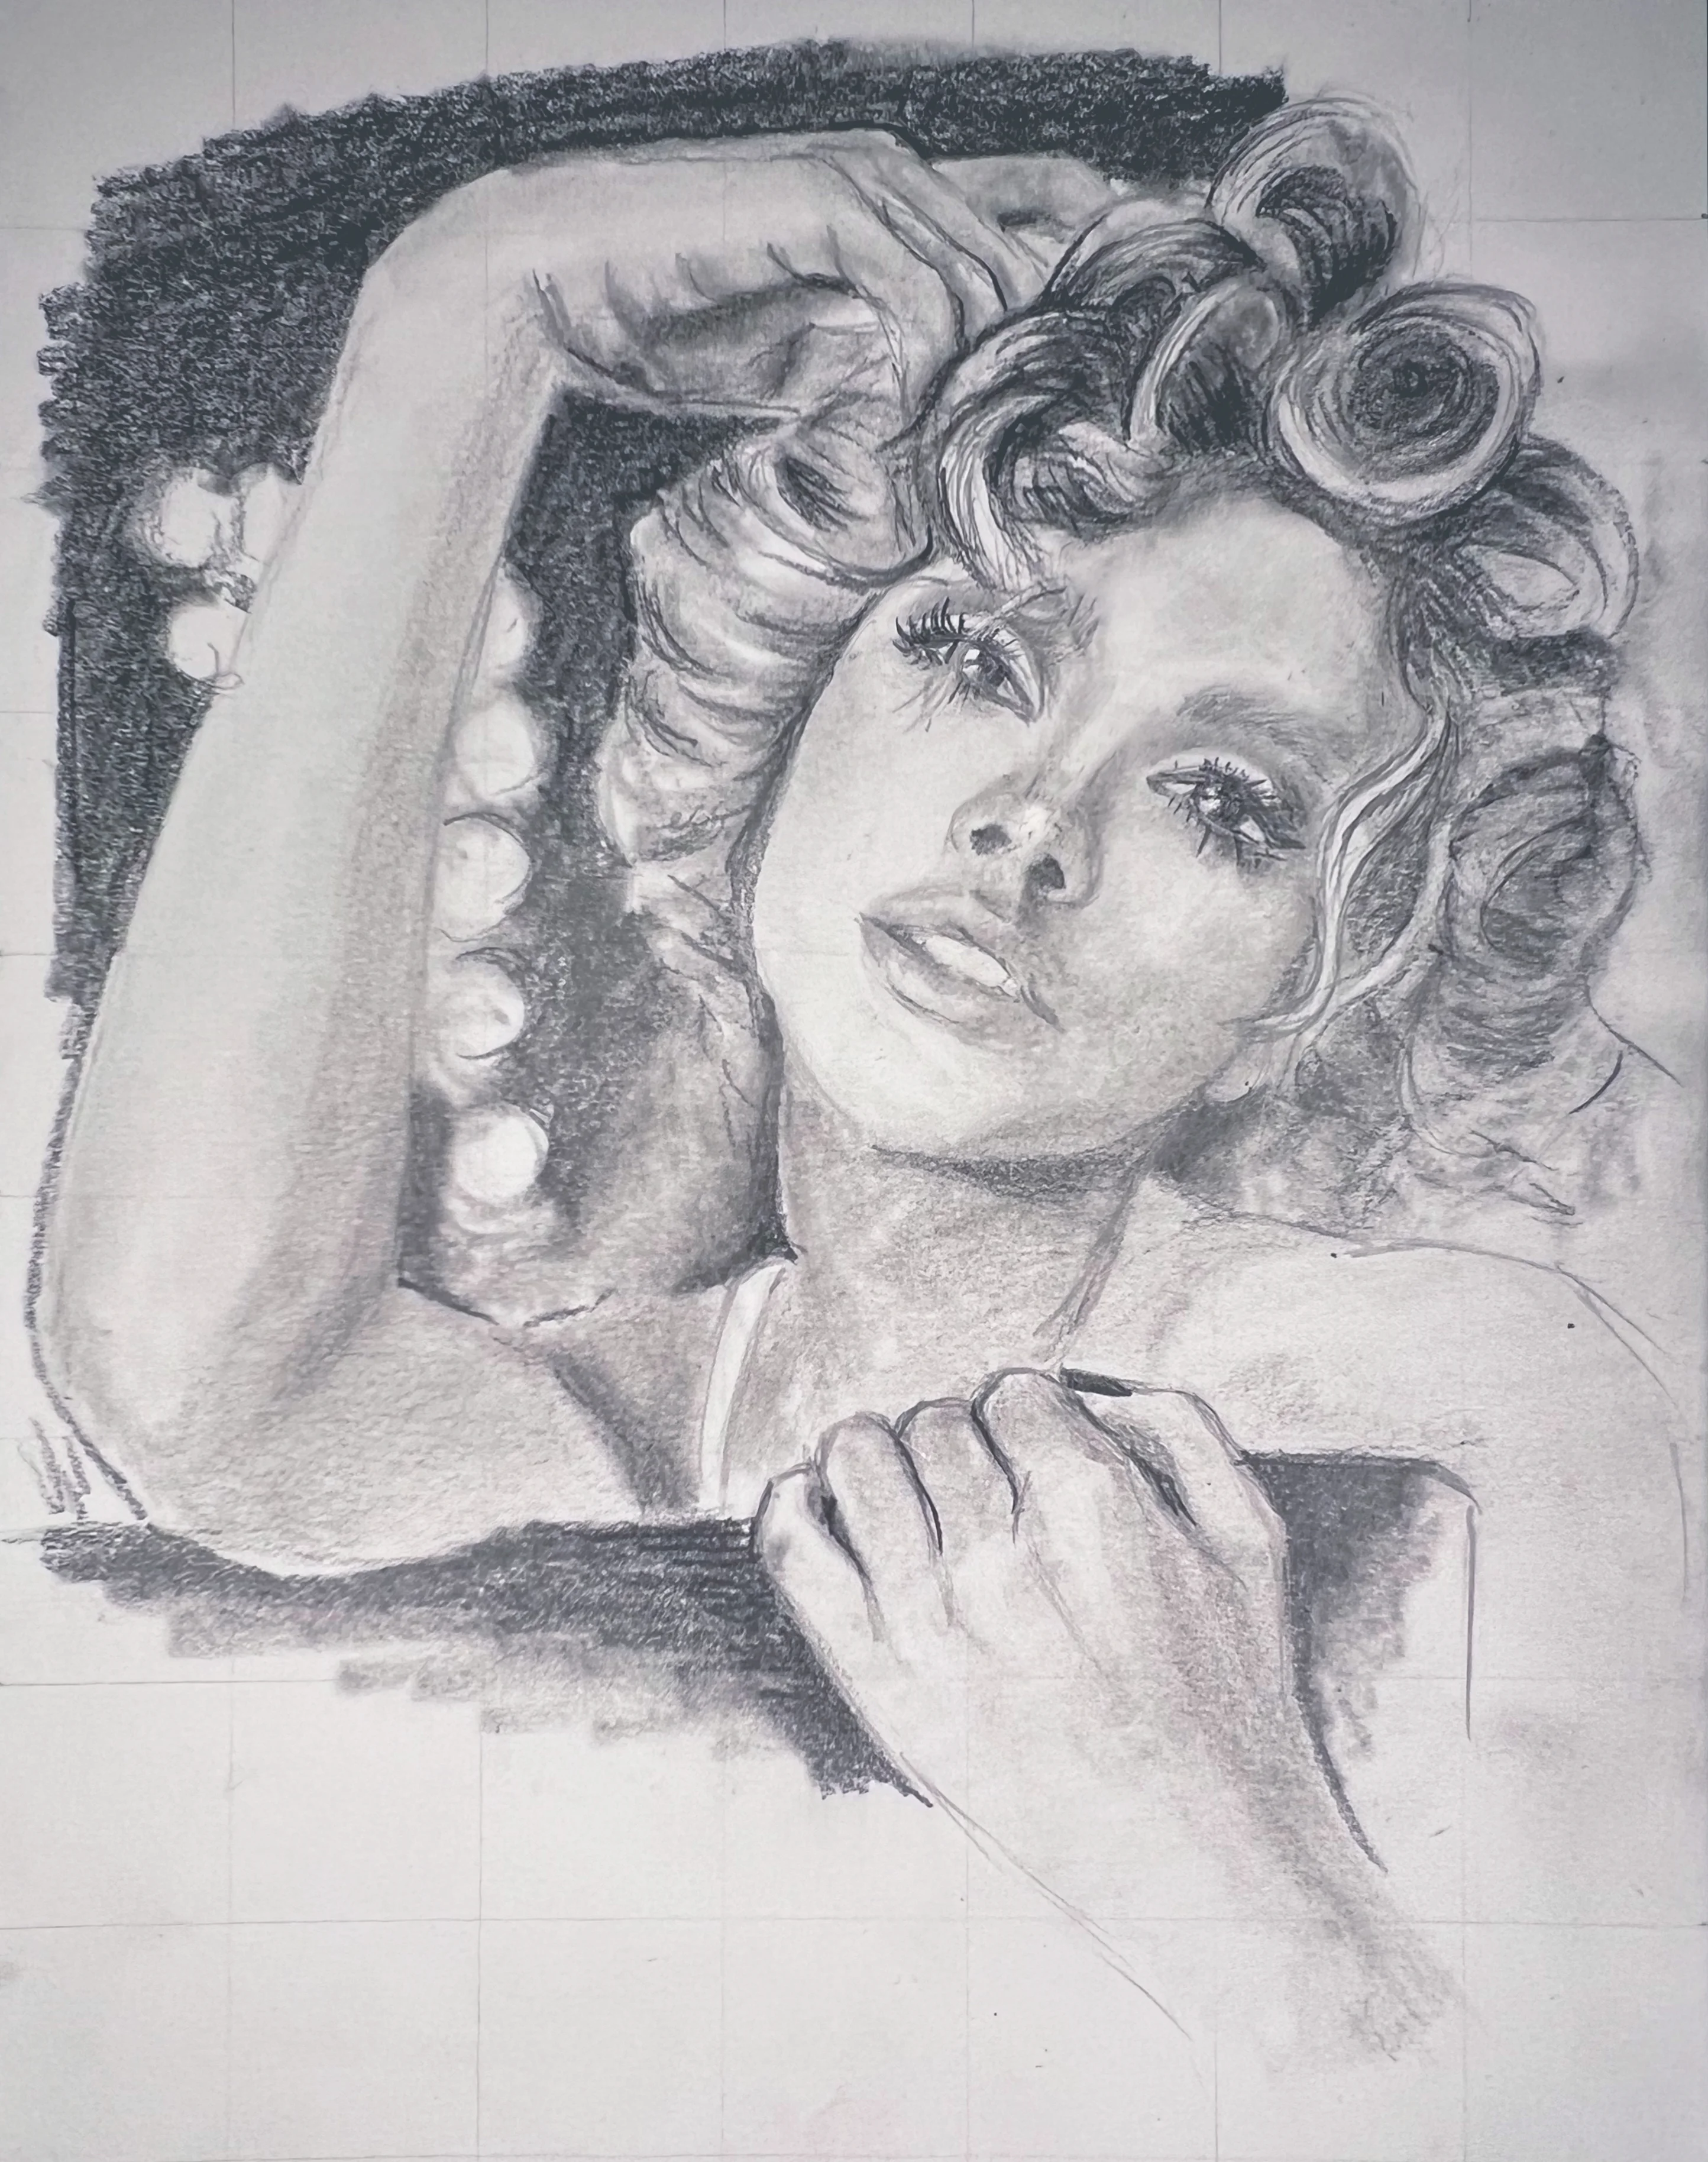
Once the larger value groups were established, I used a blending stump to even out the graphite and soften the texture. At this point I stopped worrying about whether everything was absolutely perfect and started responding to the drawing itself. If something caught my attention, I'd work on it. If another area felt close enough, I'd leave it alone and move on.
There's something I really enjoy about working this way. The drawing feels less like a technical exercise and more like a conversation. Instead of trying to force every decision from the beginning, I let the portrait gradually tell me what it needed next.
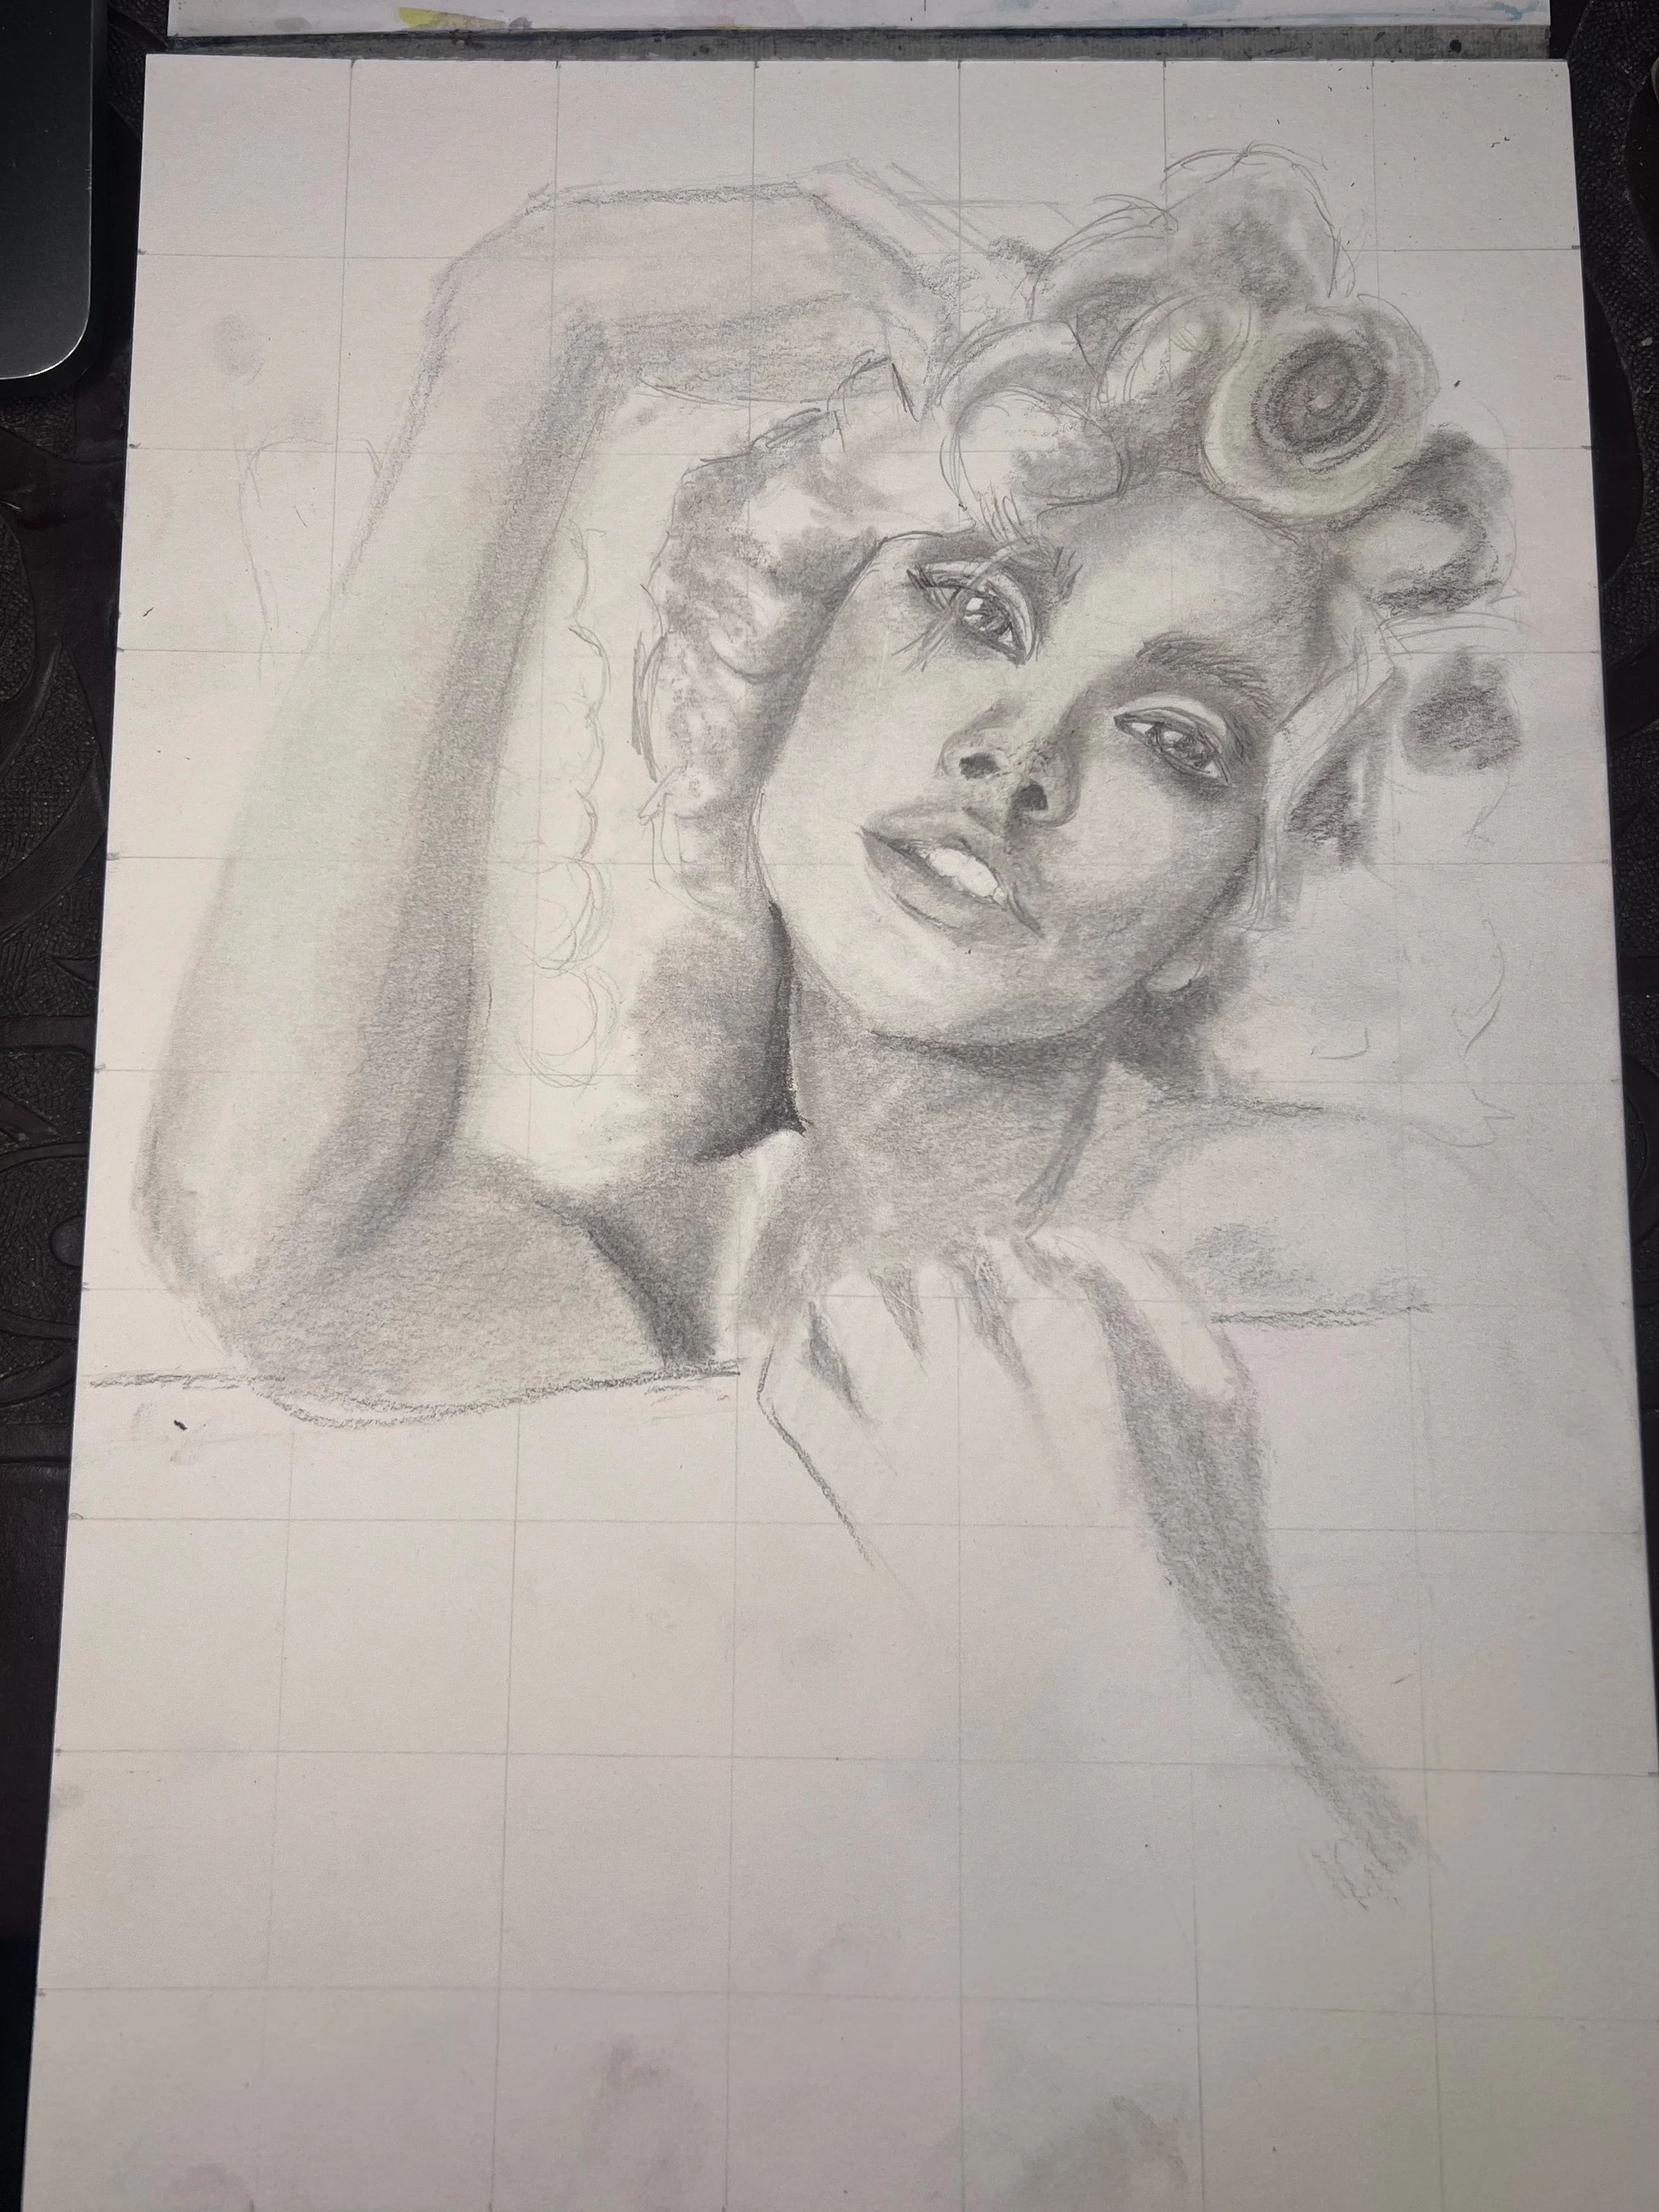
Maybe I notice the cheek is looking a little flat, so I deepen the shadow beneath it. Then I realise the edge of the jaw is softer than I've drawn it, so I blend that transition. A few minutes later I spot that the eye has lost some contrast, so I darken the pupil and eyelashes before moving on again. There wasn't really a strict roadmap beyond continually asking myself one simple question: "What would make this drawing look better?"
Sometimes the answer was darkening a shadow. Sometimes it was softening an edge. Sometimes it was simply leaving an area alone.
The important thing is to observe how the portrait looks as a whole. It's common to fixate on one detail such as an eye, and to work very hard on getting it as accurate as possible, only to find out that while the eye itself looks just like the reference, it's too big, or slanted in the wrong direction, or just not quite in the right place. The trick is to use other parts of the image as reference points, especially when your grid starts to disappear beneath the graphite. Ask yourself questions such as: Where does this eye sit in relation to the ear? Is the corner of the mouth in line with the pupil of the eye? Is the shadow beneath the eye as dark as the shadow under the eyebrow?
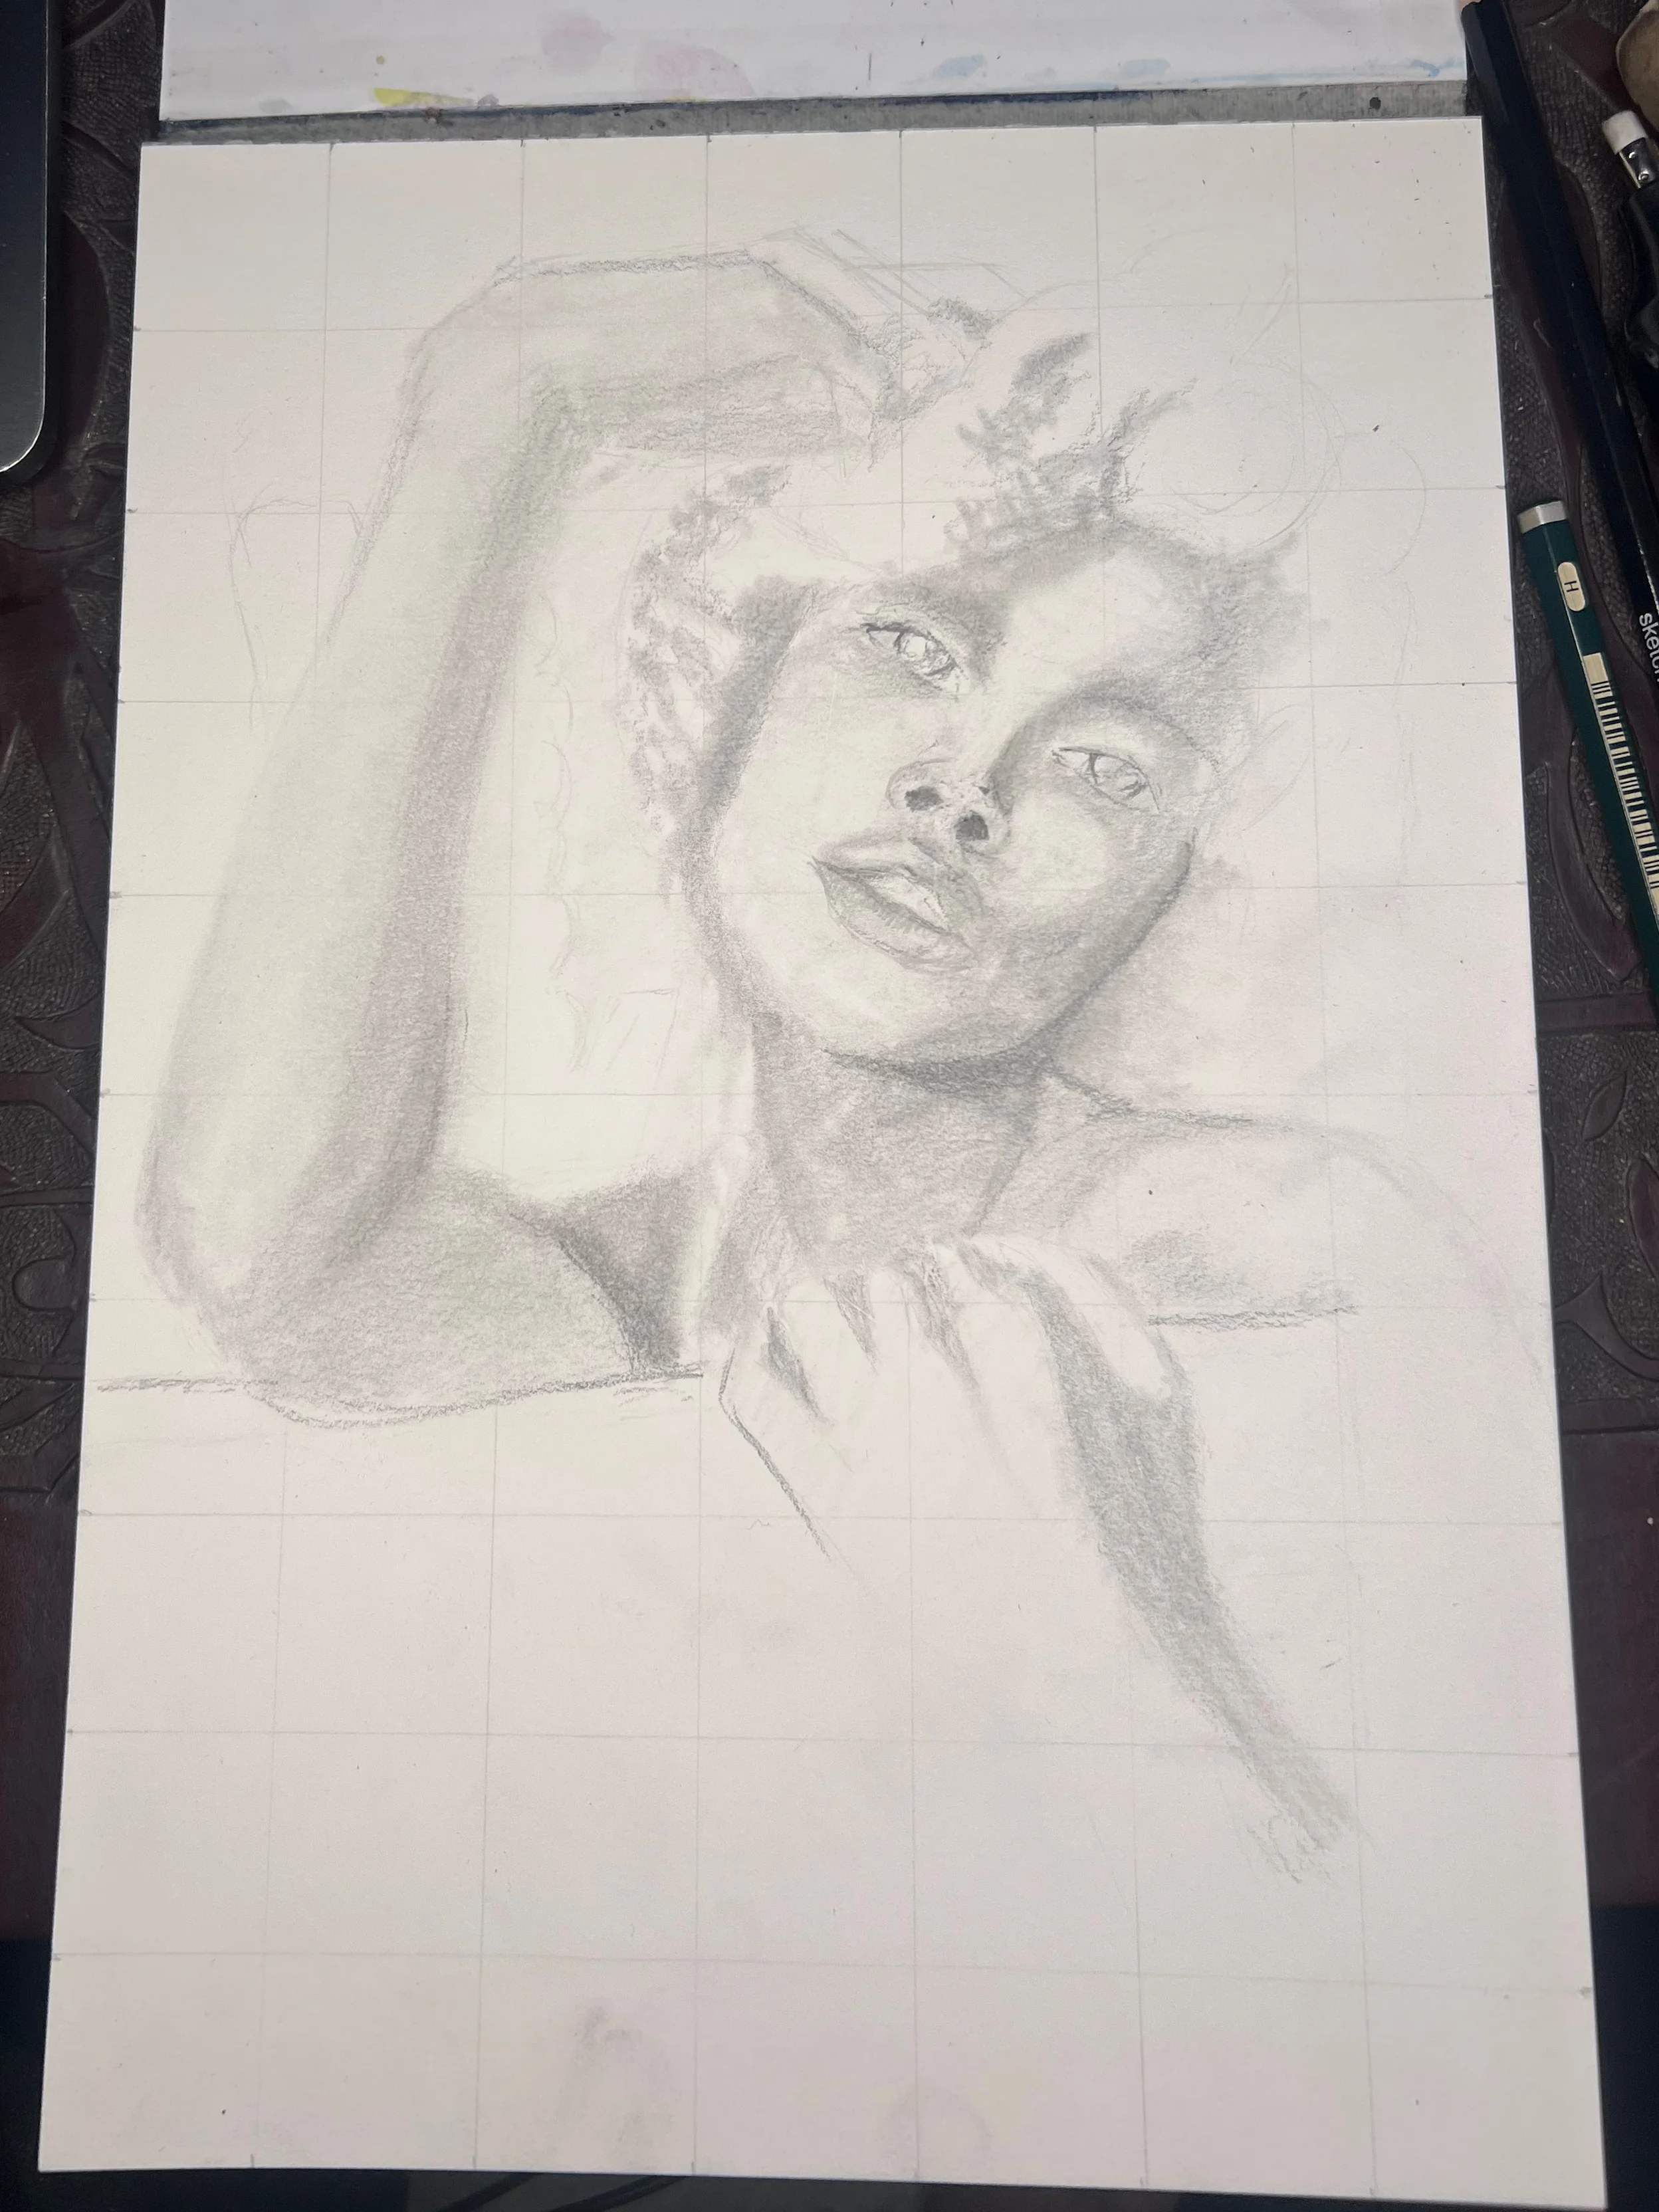
Drawing form instead of lines
Years ago another artist said something that's stayed with me ever since: "There are no outlines in life." I don't think that's literally true. There are plenty of situations where hard edges exist. But I understood what they meant.
Take the nose, for example. Most of its shape isn't created by outlines at all. It's created by gradual transitions between light and shadow. As beginners, it's very tempting to draw everything with lines because lines feel concrete. In reality, many forms become much more convincing when they're suggested through values instead.
Whenever practical, try to think less about outlining objects and more about describing the way light moves across their surface. It's a subtle shift in thinking, but one that made a huge difference to my own drawings.
Final thoughts
One of the things I like most about working this way is that it keeps drawing feeling fun. Not every portrait has to be your magnum opus. Sometimes it's enough to spend an afternoon making something that you're excited to show someone afterwards.
I think that's especially important when you're learning. Every finished drawing teaches you something. You become a little more confident with proportions, a little more comfortable with shading, and a little better at recognising the shapes that make up a face. Those improvements come from mileage, not from waiting until you're ready to create the perfect portrait.
The grid can really help with that. By taking care of the measuring, it lowers the barrier to getting started. Once the proportions are on the page, you're free to explore, experiment, and simply enjoy the process of drawing.
There are countless ways to use the grid method, and this is just one of them. On another day, I might approach a portrait completely differently depending on what I wanted to achieve. But if you've been looking for an excuse to grab a pencil, put on some music, and spend a few hours making something, I hope this has given you one.
Now find a reference, grid it up the way you want, and see where it takes you.
Ready to grid your own reference?
Upload your reference image, set your canvas size, and generate a professional grid overlay in seconds.
Launch the tool for free